
 TypingMind×
 Meta Model API
About Meta Model API
Meta Model API is Meta's developer platform for its Muse Spark models. Muse Spark accepts text, images, PDFs, video, and audio as input, making it a good fit for multimodal chat and document analysis.
The API uses pay-as-you-go pricing and is drop-in compatible with the OpenAI SDK, so it works with any OpenAI-compatible client. The same console includes chat and image playgrounds, usage tracking, and billing.
Step by step guide to use Meta API Key to chat with AI
I. Get Your Meta API Key
First, you'll need to obtain an API key from Meta. This key allows you to access their AI models directly and pay only for what you use.
- Visit Meta's API console
- Sign up or log in to your account
- Navigate to the API keys section
- Generate a new API key (copy it immediately as some providers only show it once)
- Save your API key in a secure password manager or encrypted note
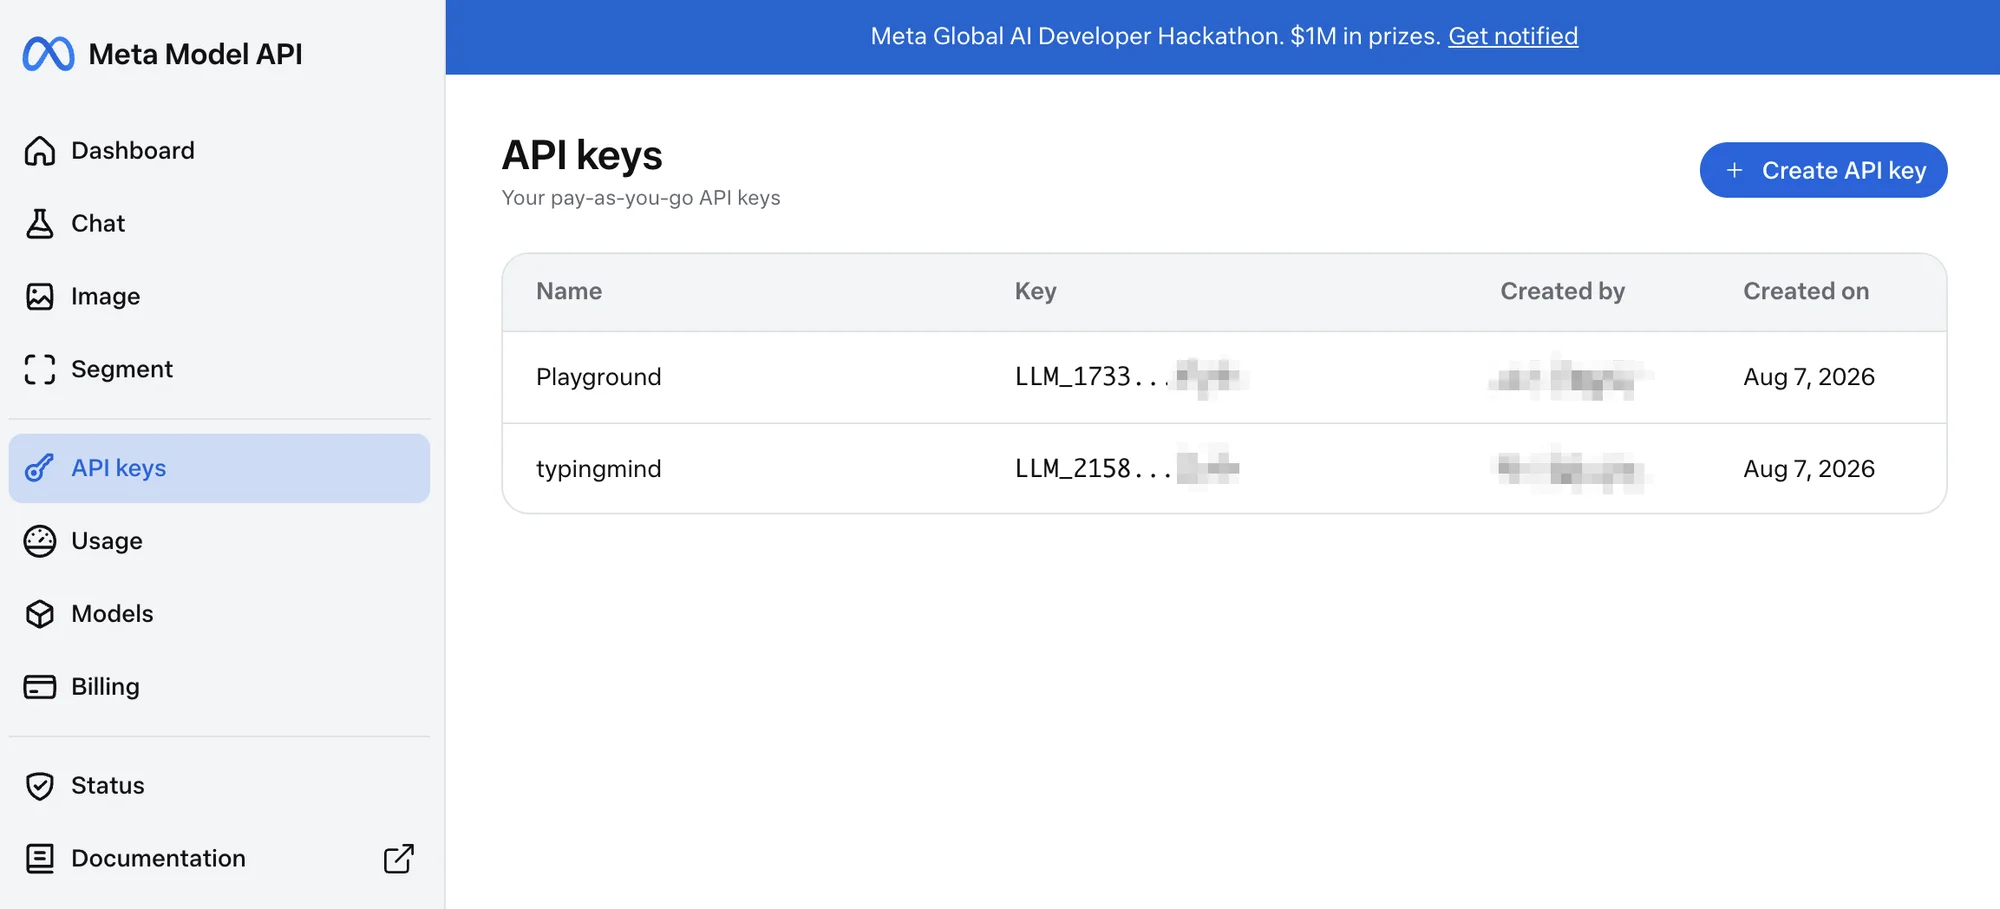
Sometimes, this provider will require you to add a payment method to your account before you can use your API key to chat with AI. So, to avoid any hiccups, make sure you've got a payment method set up and ready to go!
Important: Keep your API key secure and never share it publicly. Store it safely as you'll need it to connect with TypingMind.
II. Connect Your Meta API Key on TypingMind
Once you have your Meta API key, connecting it to TypingMind to chat with AI is straightforward:
Option 1: Use the built-in Meta provider (recommended)
The quickest way. TypingMind already has Meta set up, so you only need to add your API key.
- Open TypingMind and click "Models" in the left sidebar.
- Search for Meta.
- Click the settings (gear) button next to Meta.
- Paste your API key and save.
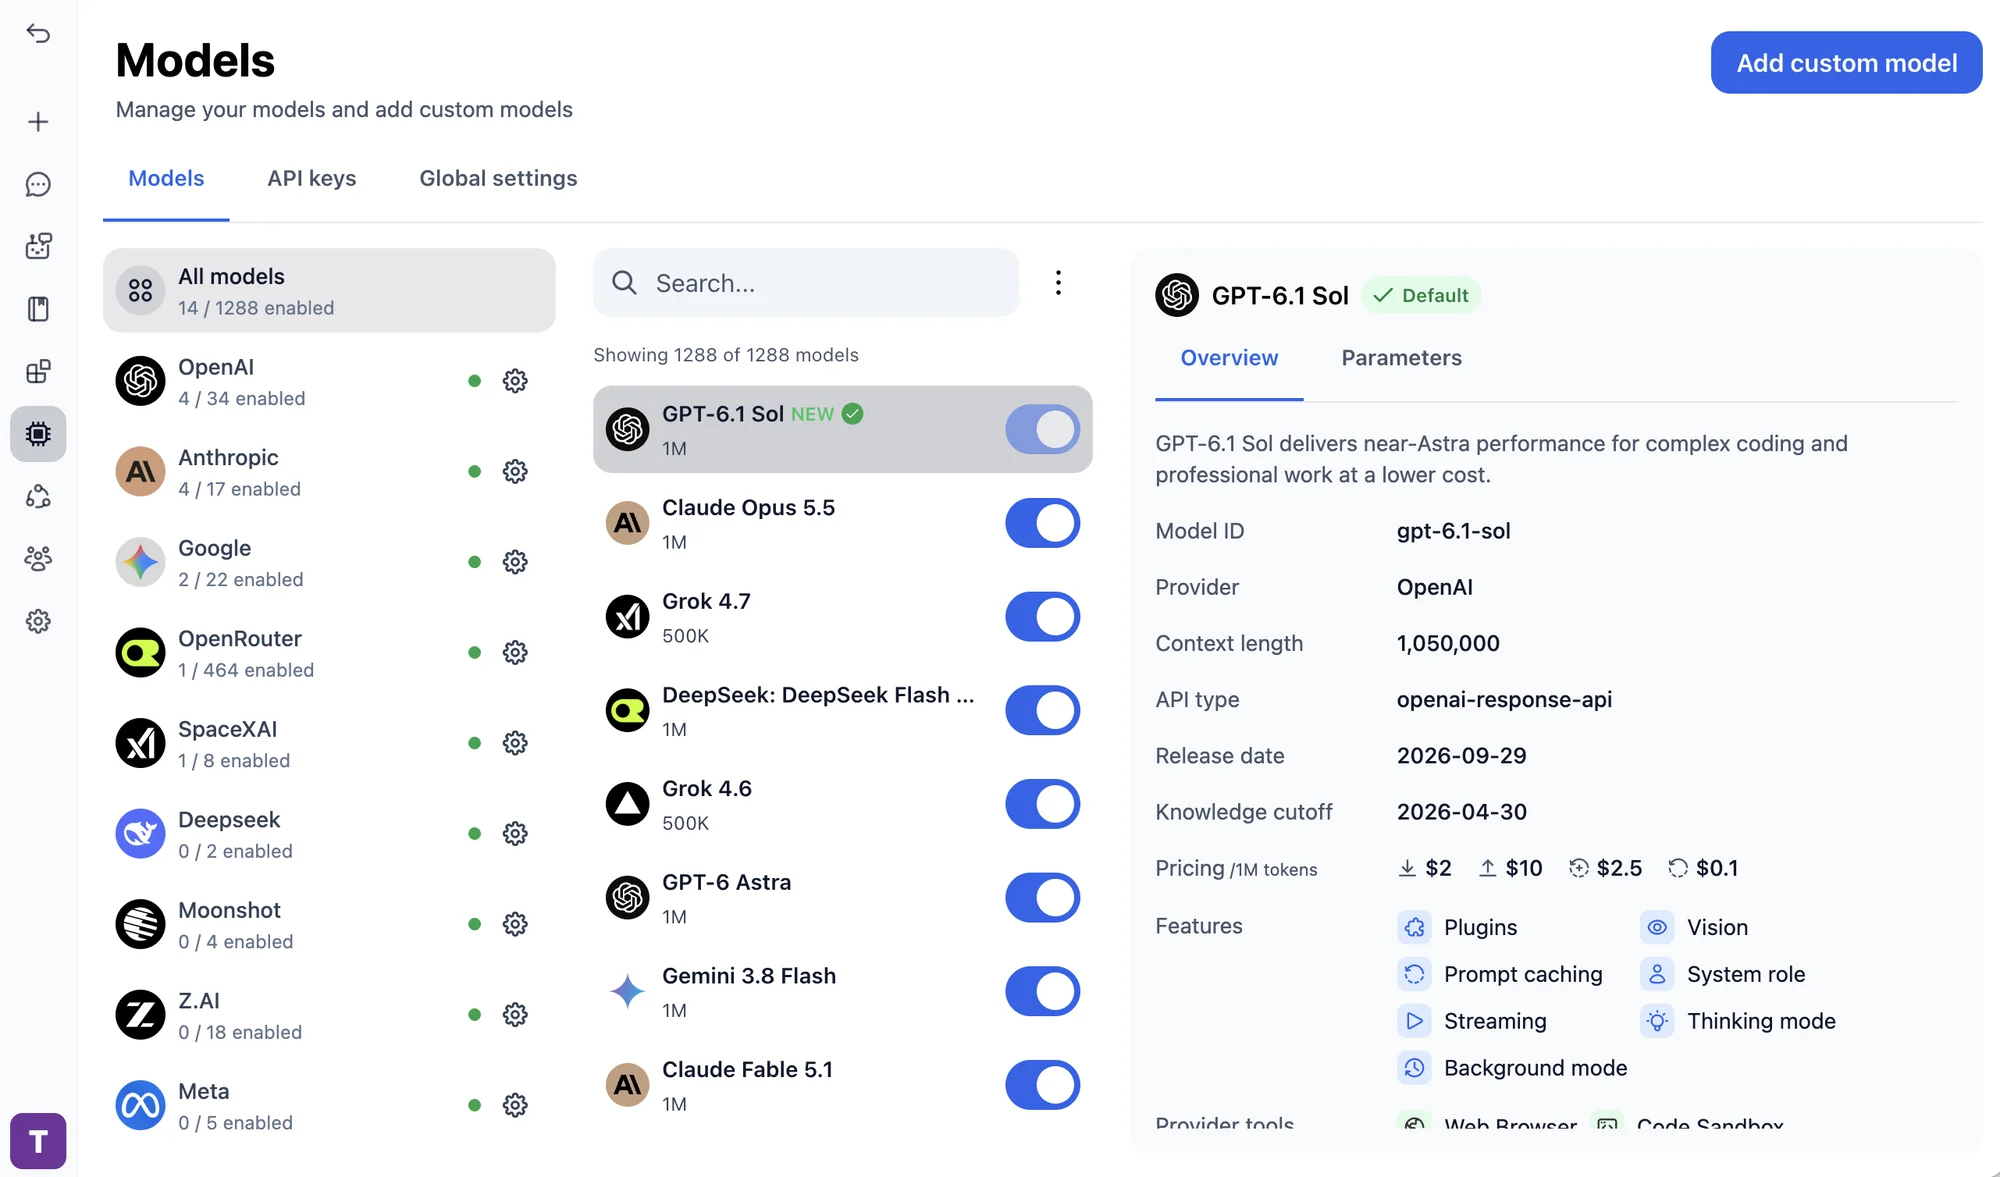
Option 2: Add the model manually
If you can't find the provider or model ID in the official list, you can add the model manually:
Open the Models page
Open TypingMind, click "Models" in the left sidebar, then click "Add custom model" in the top right corner.
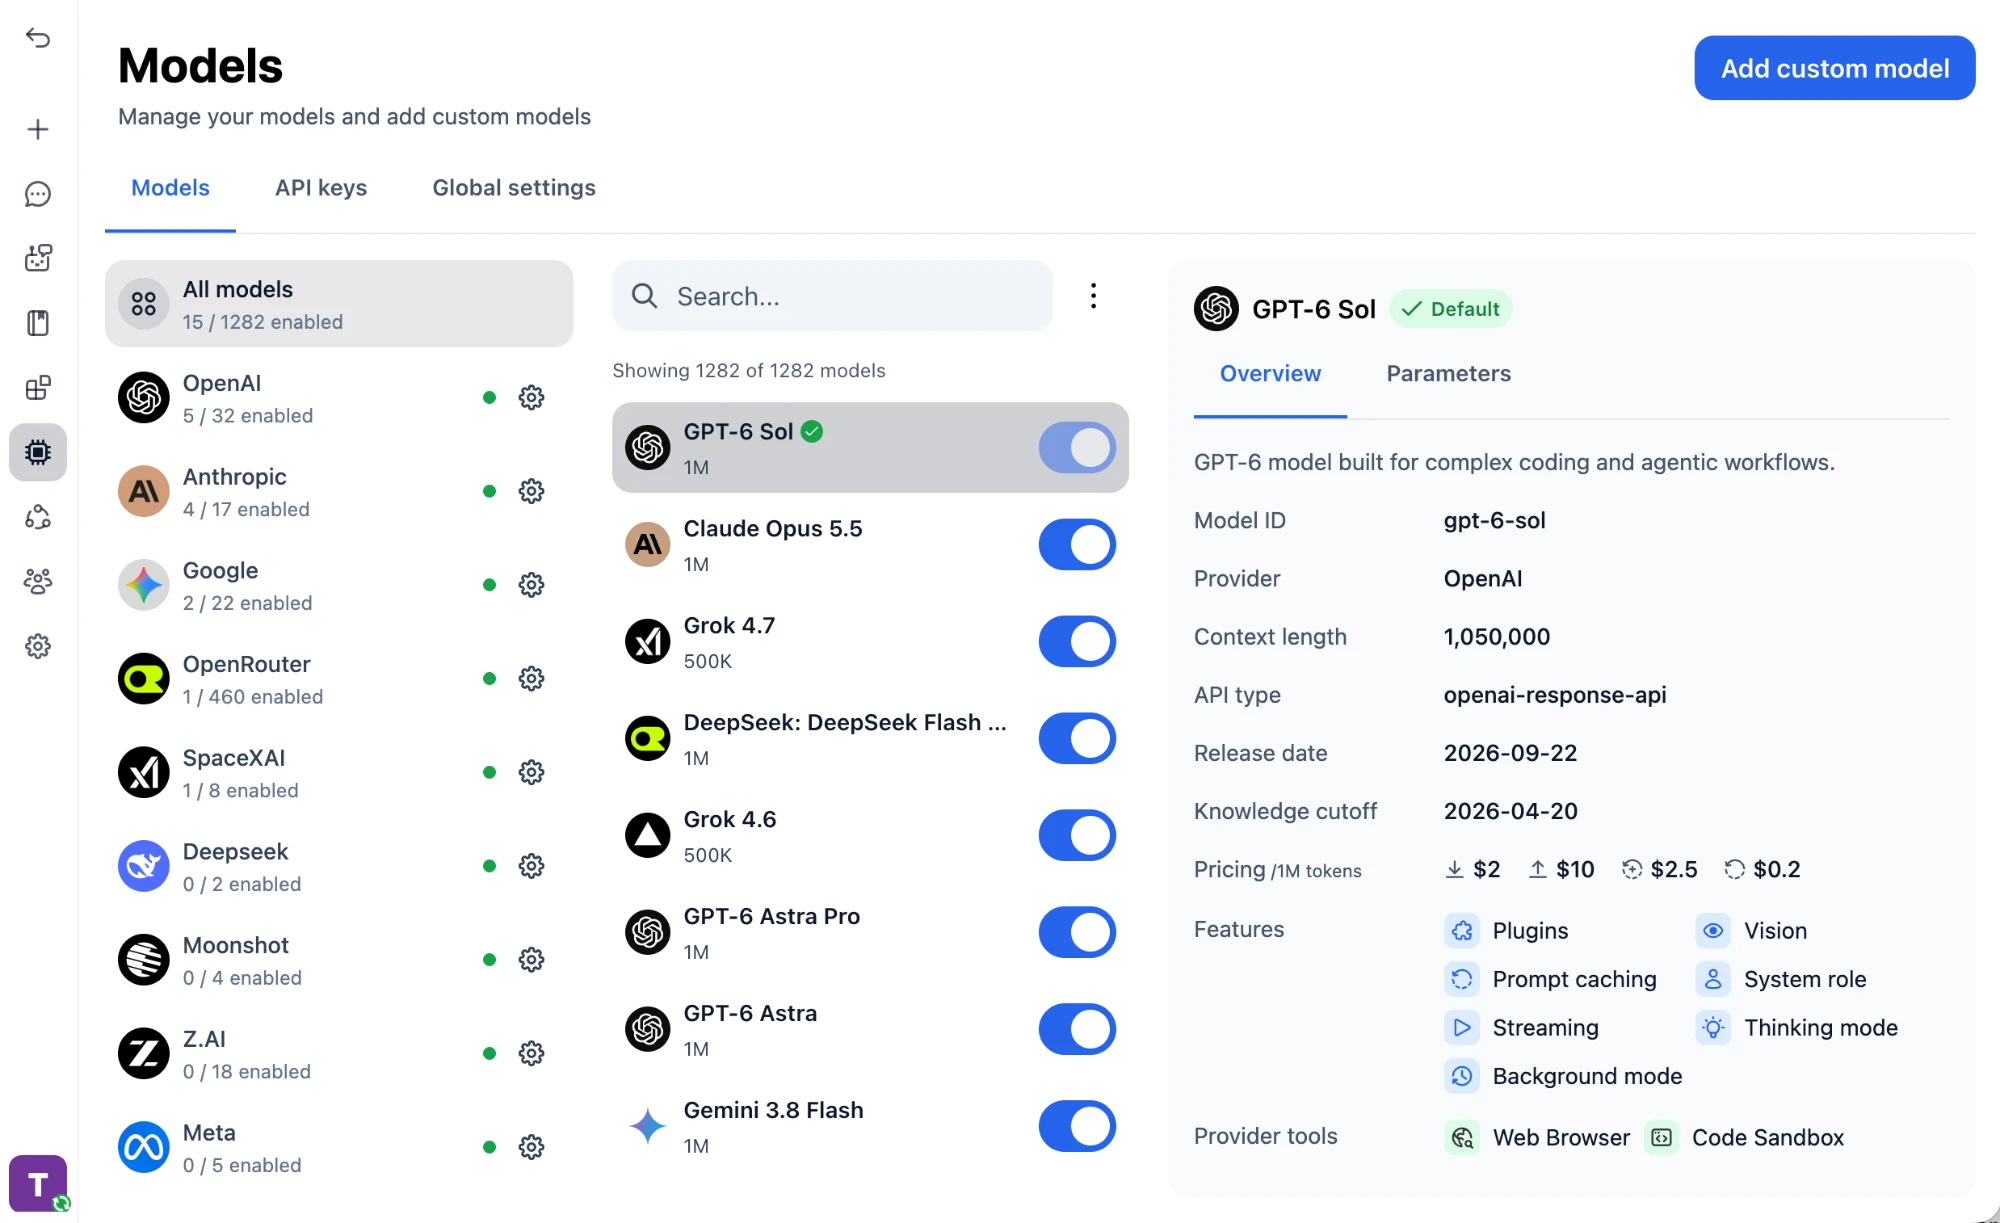
Enter the model details
Keep "Create Manually" selected and fill in the model details:
Name:muse-spark-1.3 via Meta(or your preferred name)Model ID:muse-spark-1.3for example (check Meta model list)Context Length: Enter the model's context window (e.g., 1048576 for muse-spark-1.3)
Set up authentication
In the "Authentication" tab, set the connection details:
API Type:OpenAI Responses APIEndpoint URL:https://api.meta.ai/v1/responsesAuthentication Type:API Key via HTTP HeaderHeader Key:AuthorizationHeader Value:Bearer <META_MODEL_API_KEY>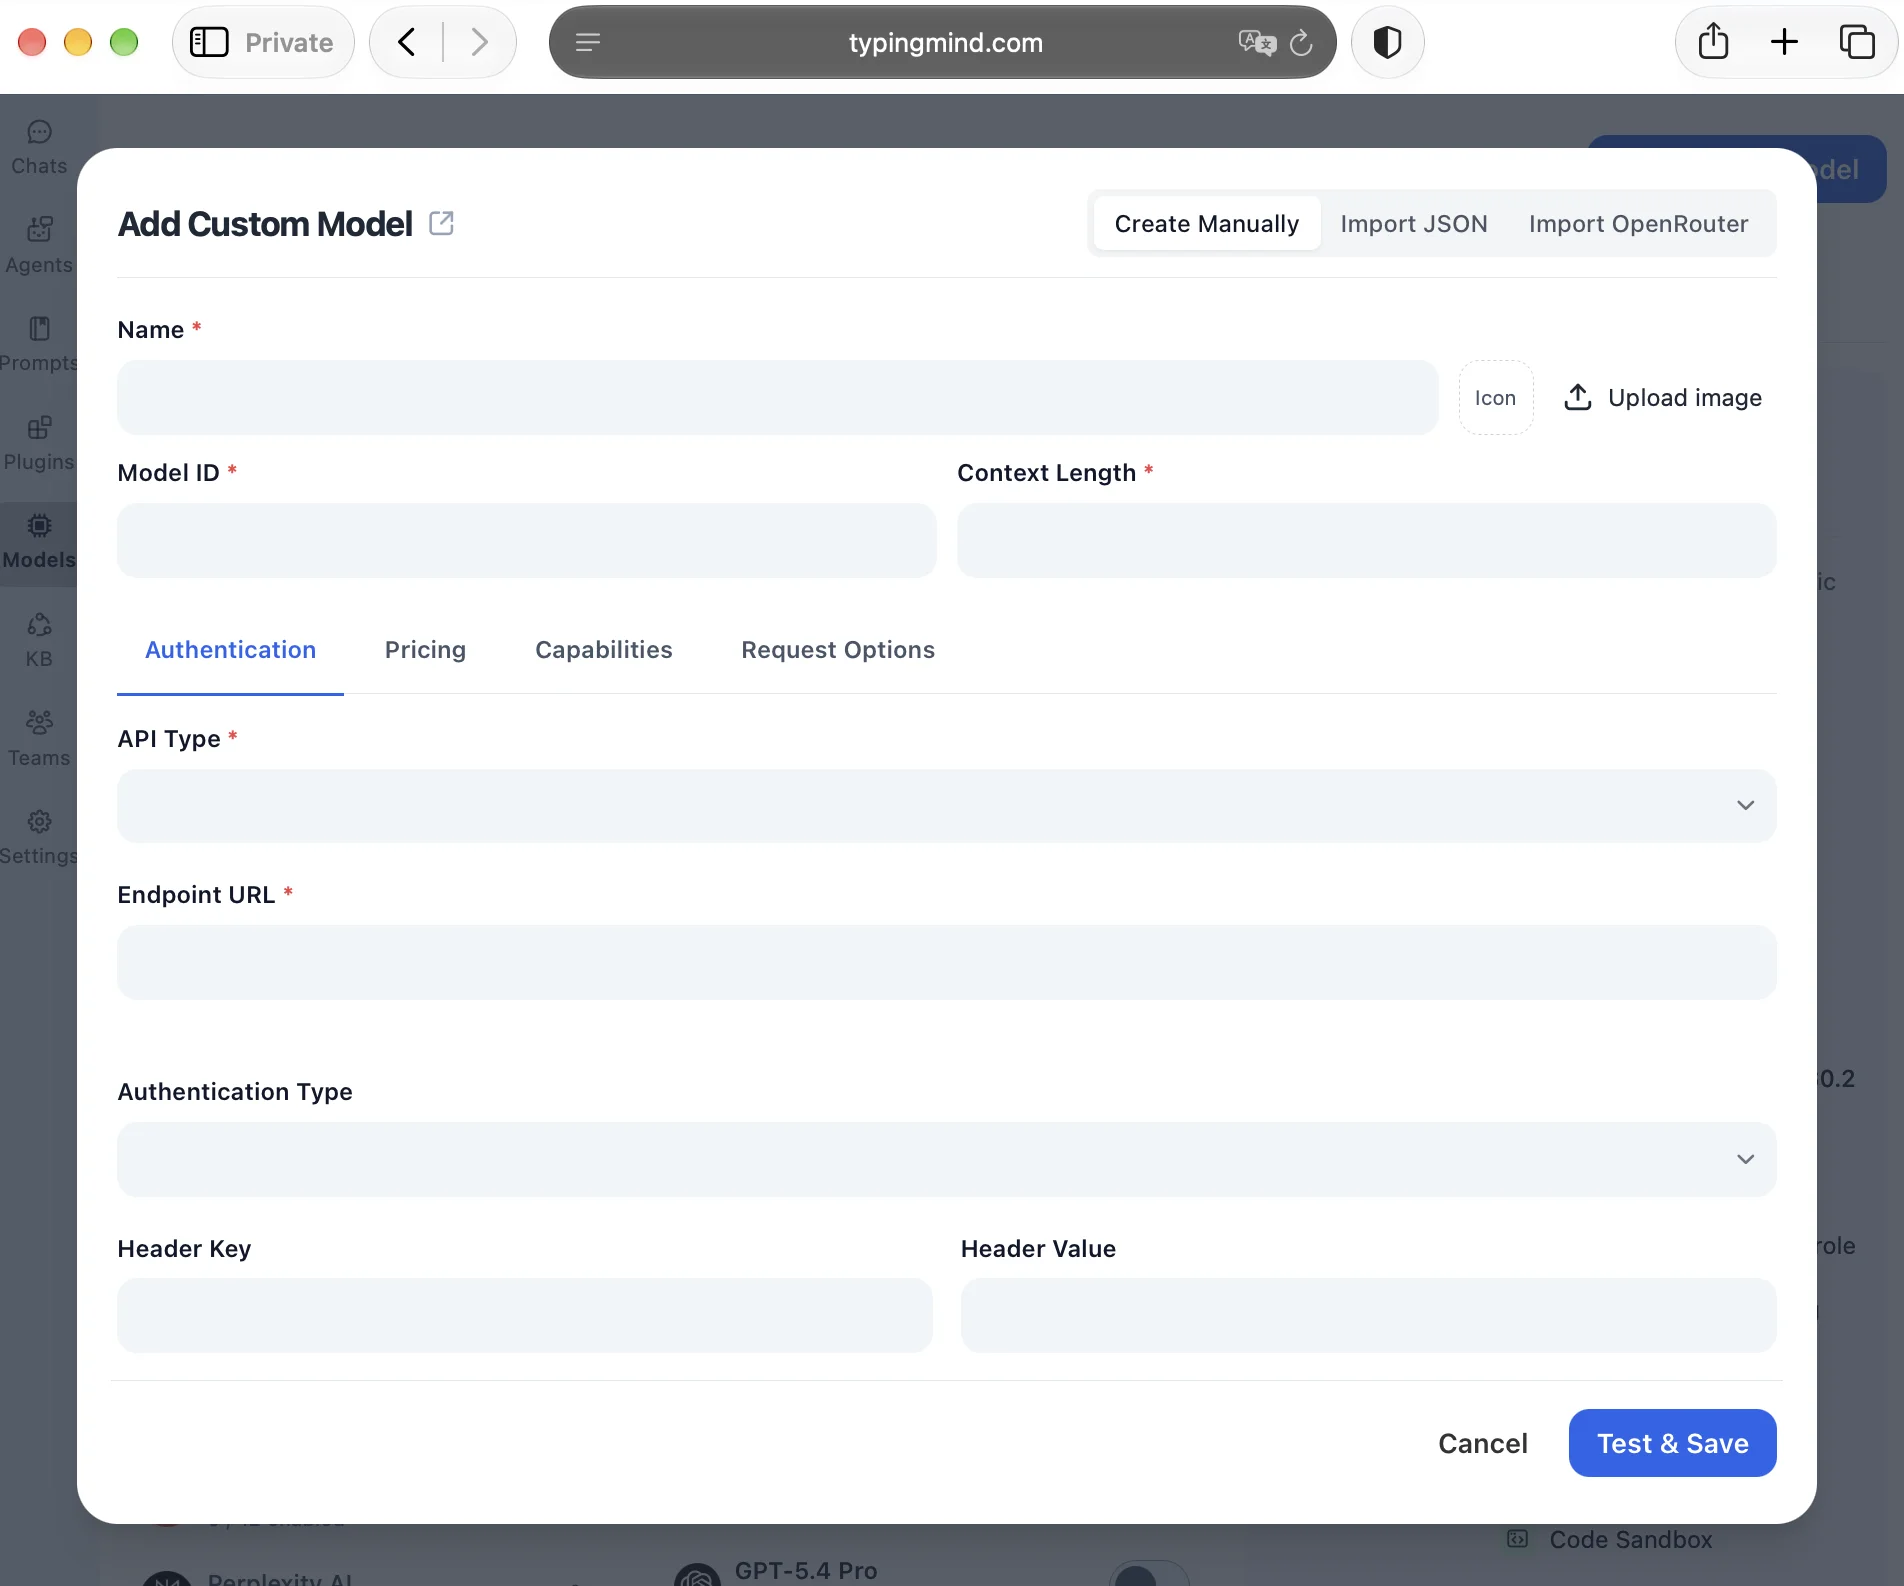
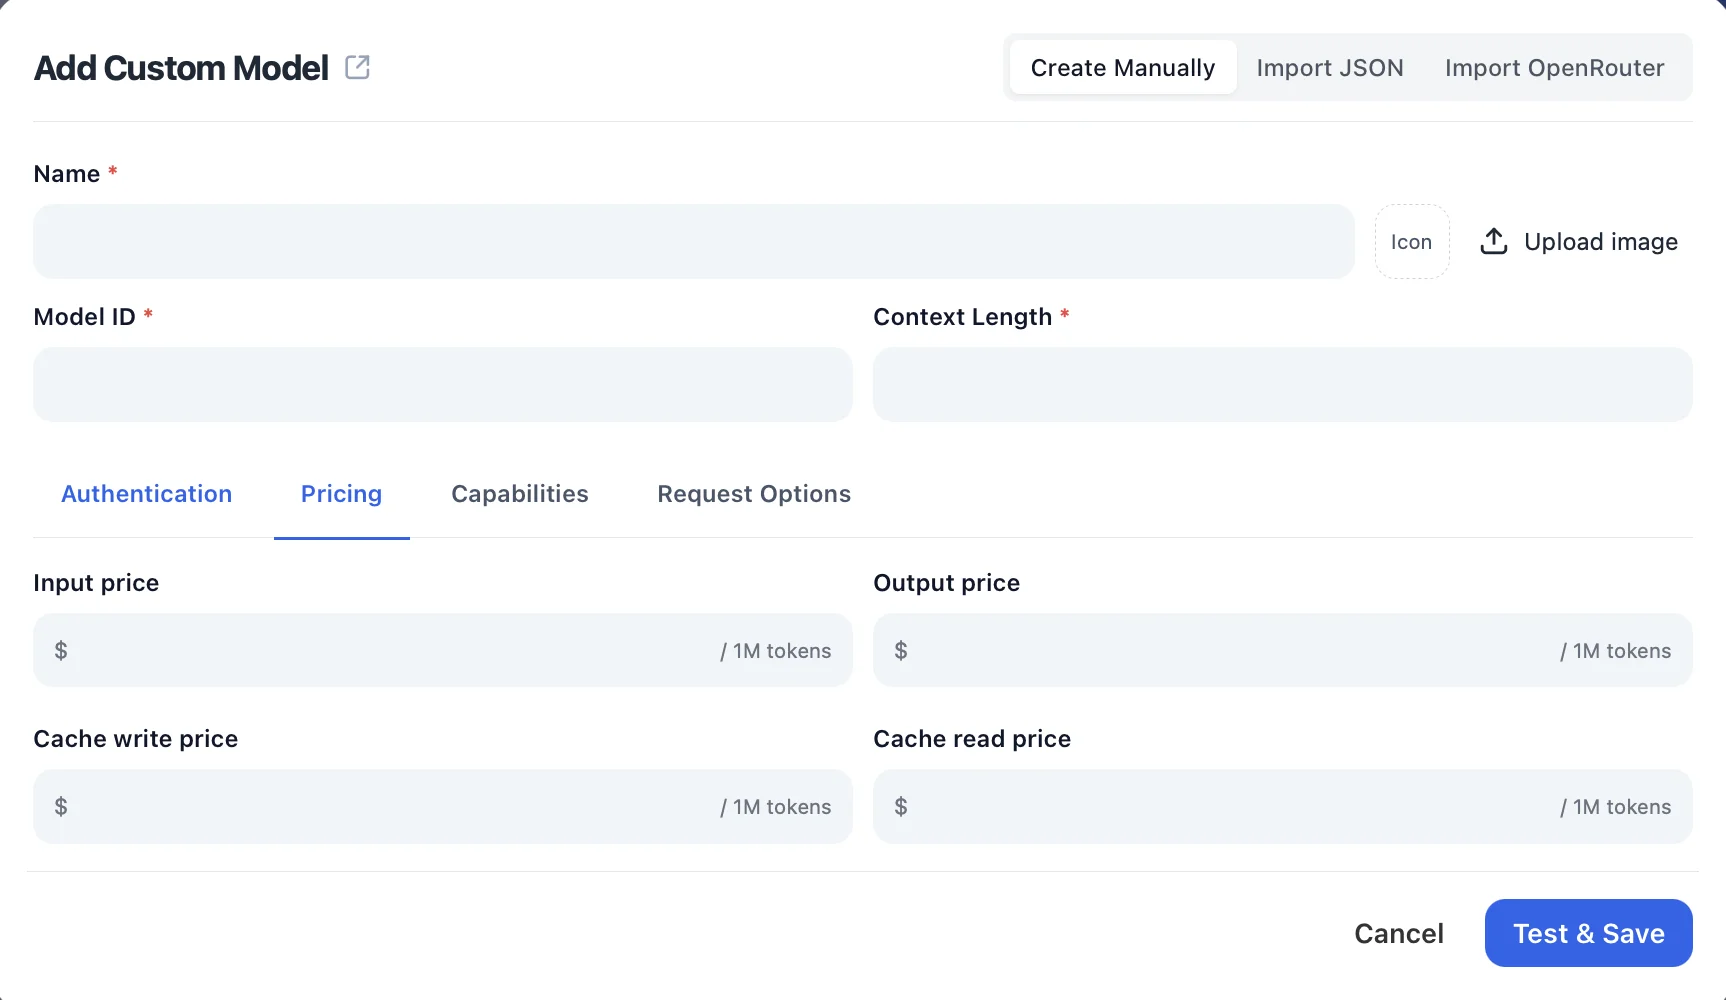
Add pricing (optional)
Open the "Pricing" tab and enter the model's input, output, and cache prices per 1M tokens so TypingMind can estimate your usage costs.
Check the capabilities
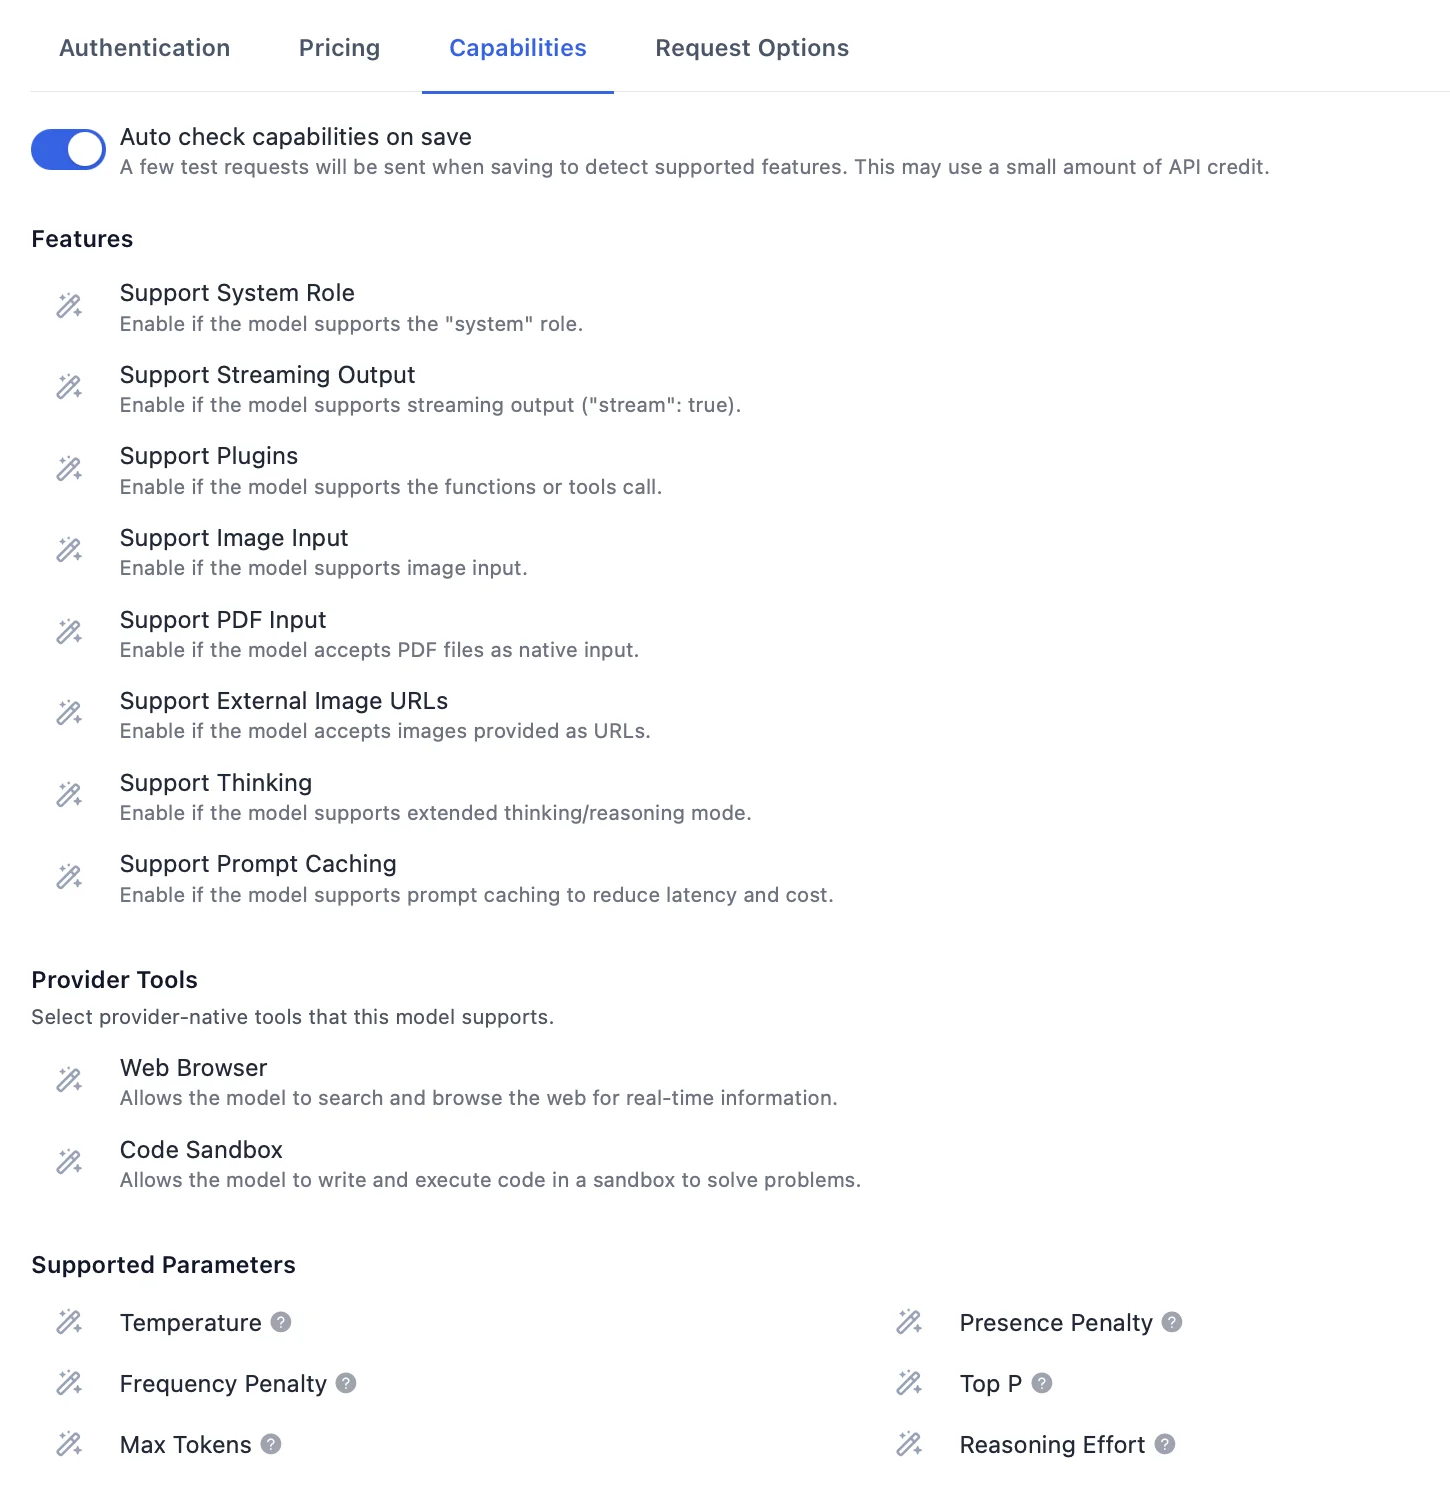
In the "Capabilities" tab, keep "Auto check capabilities on save" on so TypingMind detects supported features like plugins, image input, and thinking, or enable them manually.
Test and save
Click "Test & Save" to verify the connection and add the model.
III. Start Chatting with Meta models
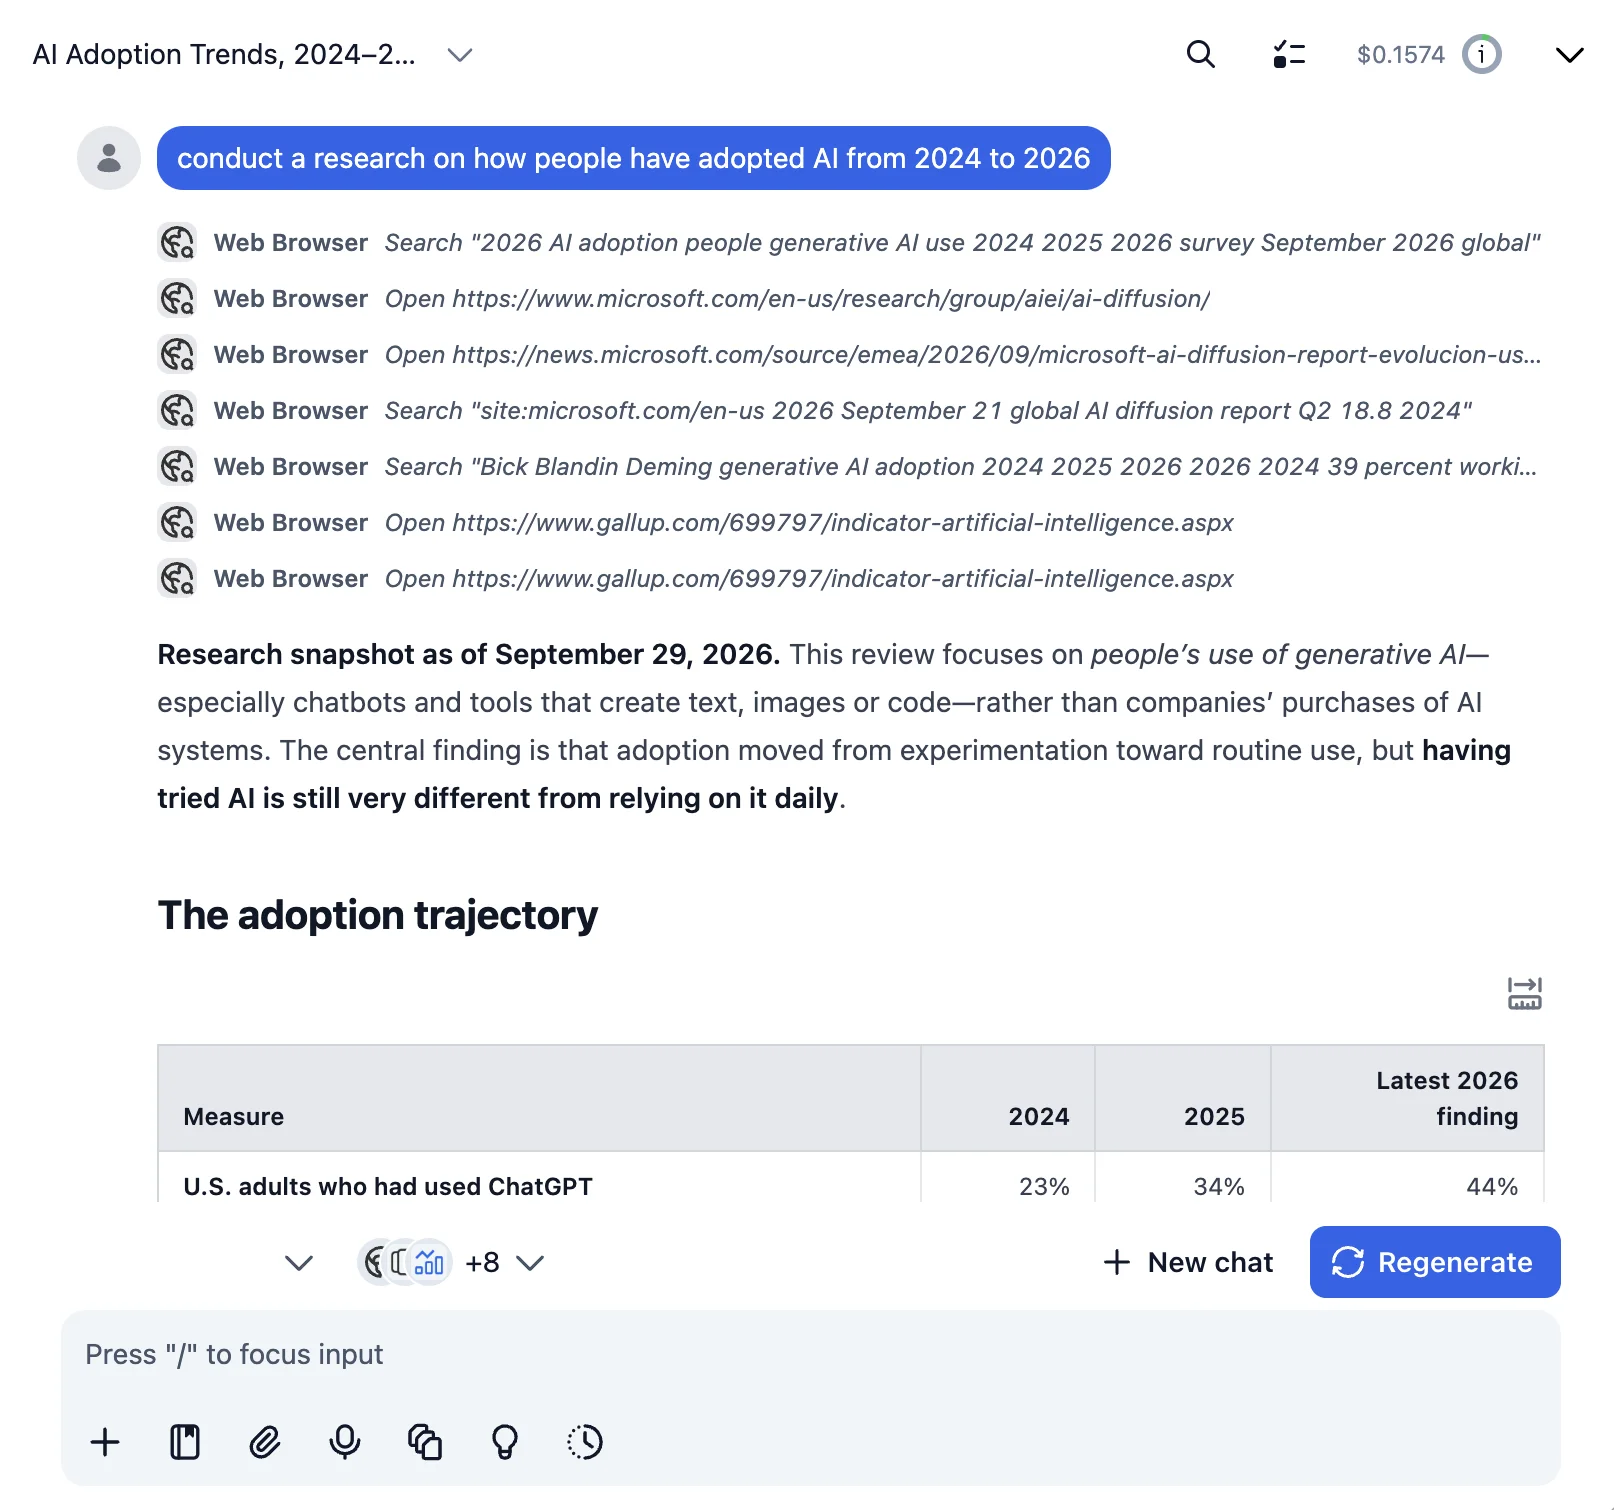
Now you can start chatting with Meta Model API models through TypingMind:
- Select Meta Model API models from the model dropdown menu
- Start typing your message in the chat input
- Enjoy faster responses and better features than the official interface
- Switch between different AI models as needed
💡 Pro tips for better results:
- Use specific, detailed prompts for better responses (How to use Prompt Library)
- Create AI agents with custom instructions for repeated tasks (How to create AI Agents)
- Use plugins to extend Meta Model API models with web search, code execution, and more (How to use plugins)
- Upload documents and images directly to chat for AI analysis and discussion (Chat with documents)
IV. Monitor Your AI Usage and Costs
One of the biggest advantages of using API keys with TypingMind is cost transparency and control. Unlike fixed subscriptions, you pay only for what you actually use. Visit your Meta usage dashboard to monitor your API usage and set spending limits.
- Use less expensive models for simple tasks
- Keep prompts concise but specific to reduce token usage
- Use TypingMind's prompt caching to reduce repeat costs (How to enable prompt caching)
- Using RAG (retrieval-augmented generation) for large documents to reduce repeat costs (How to use RAG)
Why TypingMind + Meta?
Chat with Meta models and 200+ other models in one workspace, using your own Meta API key.
Best-in-class UI
TypingMind's interface is far superior to standard chat UIs.
Model flexibility
Switch between Meta models and 200+ models instantly.
Cost control
Pay only for what you use through Meta.
One-time purchase
Buy TypingMind once, use forever with any Meta model.
Data privacy
Your conversations are stored locally by default, not on external servers.
Plugins, MCP, Skills & AI agents
Extend Meta models with web search, image generation, and custom AI agents.
Frequently Asked Questions
Do I need a subscription to use Meta with TypingMind?
No. With your own Meta API key, you pay only for what you use, with no monthly subscription. TypingMind is also a one-time purchase, not a subscription.
How much does the Meta API cost?
Meta charges per token, and prices vary by model. For example, muse-spark-1.3 costs $1.25/1M input tokens and $4.25/1M output tokens. A typical conversation costs around $0.01-0.10, depending on the model and length.
Which Meta models can I use in TypingMind?
Any model your Meta API key can access. You can switch between Meta models and models from other providers in the same TypingMind chat.
Is my data private when using Meta with TypingMind?
TypingMind stores your conversations locally (in your browser on the web version, on your device in the desktop app). Your messages are sent to Meta with your API key, so check Meta's data policy for how it handles API requests.
