Xhs MCP logo

Xhs MCP

Community
jobsonlook

小红书MCP服务 x-s x-t js逆向

Publisherjobsonlook
Repositoryxhs-mcp
LanguageJavaScript
Forks
102
Stars
517
Available tools
0
Transport typestdio
Categories
Links
  • Connect tools to AI workflows

    Xhs MCP exposes MCP capabilities that can be used by compatible AI clients and agents.

  • 0 available tools

    Browse the callable actions below, including names and descriptions when provided by the server.

  • Ready-to-copy setup

    Use the installation snippets to configure this server in your preferred MCP client.

  • Open source signals

    517 stars and 102 forks from the linked repository.

小红书MCP服务

smithery badge PyPI version

一个用于小红书API的MCP(Model Context Protocol)服务器,支持搜索笔记、获取内容、查看评论和发表评论等功能。

特点

  • 采用js逆向出x-s,x-t,直接请求http接口,无须笨重的playwright
  • 搜索笔记
  • 获取笔记内容
  • 获取笔记的评论
  • 发表评论

特性

快速开始

方法一:使用uvx(推荐)

1. 环境要求

  • Python 3.12+
  • uv (安装方法: pip install uv)

2. 获取小红书的cookie

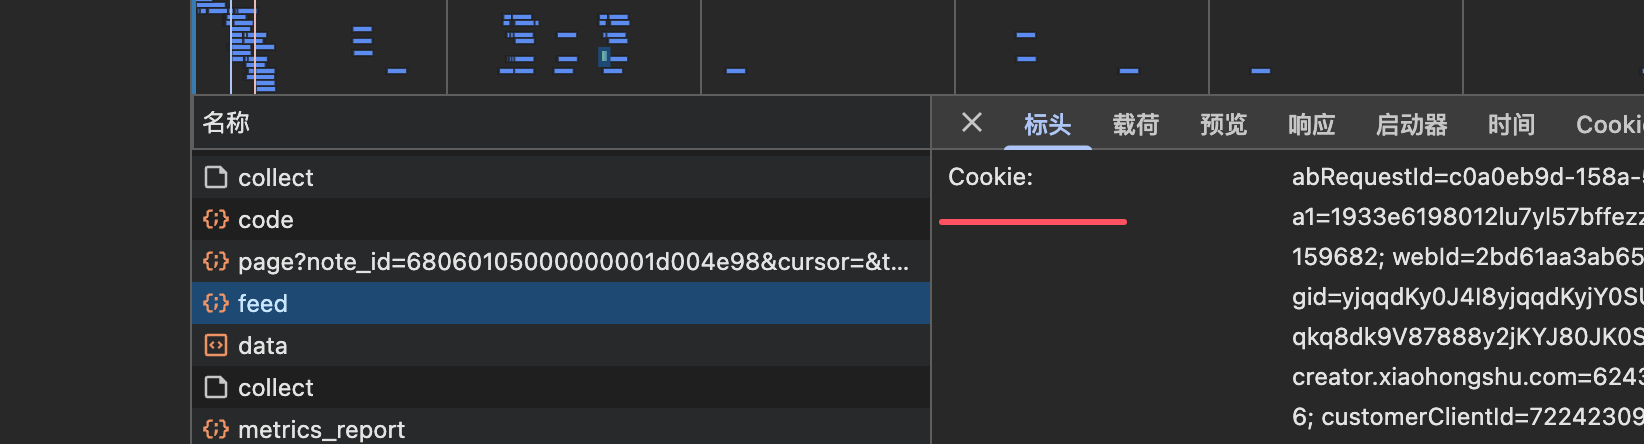
打开web小红书 登录后,获取cookie,将cookie配置到下一步的 XHS_COOKIE 环境变量中 cookie
3. 配置MCP服务器

在你的MCP客户端配置文件中添加以下配置:

json
{
    "mcpServers": {
        "xhs-mcp": {
            "command": "uvx",
            "args": [
                "--from",
                "jobson-xhs-mcp",
                "xhs-mcp"
            ],
            "env": {
                "XHS_COOKIE": "你的小红书cookie"
            }
        }
    }
}

4. 测试运行

bash
# 设置环境变量
export XHS_COOKIE="你的小红书cookie"

# 直接运行测试
uvx --from jobson-xhs-mcp xhs-mcp --help

方法二:从源码安装

1. 环境要求

  • node
  • python 3.12
  • uv (pip install uv)

2. 克隆并安装

sh
git clone git@github.com:jobsonlook/xhs-mcp.git
cd xhs-mcp
uv sync

3. 获取小红书的cookie

打开web小红书 登录后,获取cookie,将cookie配置到下一步的 XHS_COOKIE 环境变量中 cookie

4. 配置MCP服务器

json
{
    "mcpServers": {
        "xhs-mcp": {
            "command": "uv",
            "args": [
                "--directory",
                "/path/to/xhs-mcp",
                "run",
                "xhs_mcp/__main__.py"
            ],
            "env": {
                "XHS_COOKIE": "你的小红书cookie"
            }
        }
    }
}

可用工具

本MCP服务器提供以下工具:

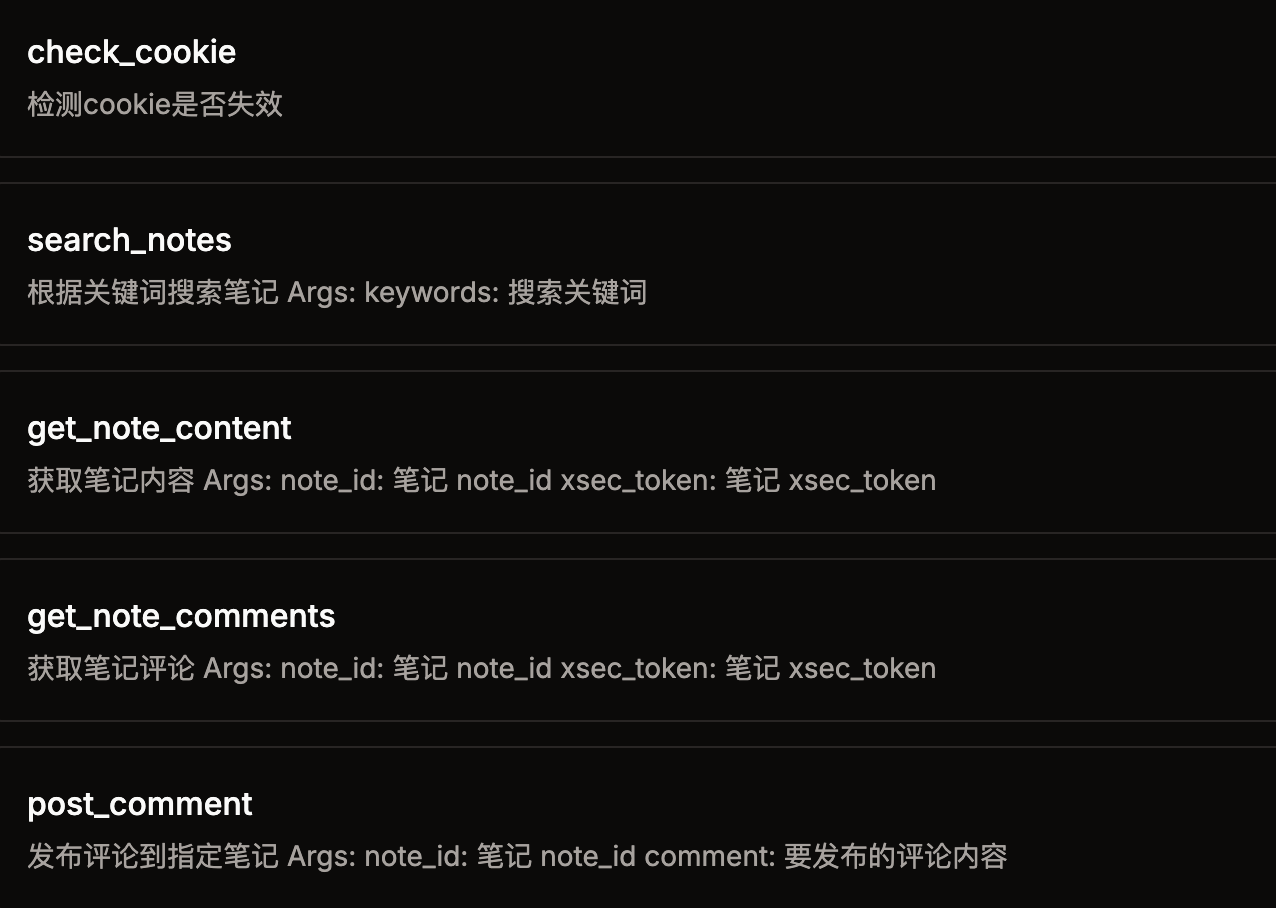
  • check_cookie() - 检测cookie是否失效
  • home_feed() - 获取首页推荐笔记
  • search_notes(keywords) - 根据关键词搜索笔记
  • get_note_content(url) - 获取笔记内容(需要带xsec_token的完整URL)
  • get_note_comments(url) - 获取笔记评论(需要带xsec_token的完整URL)
  • post_comment(comment, note_id) - 发布评论到指定笔记

使用示例

在Claude Desktop中使用

  1. 打开Claude Desktop的设置
  2. 找到MCP服务器配置
  3. 添加上述JSON配置
  4. 重启Claude Desktop
  5. 现在你可以在对话中使用小红书相关功能了

常见问题

Q: Cookie如何获取? A: 在浏览器中登录小红书网页版,打开开发者工具,在Network标签页中找到任意请求,复制Cookie头的值。

Q: 为什么提示cookie失效? A: 小红书的cookie有时效性,需要定期更新。重新登录网页版获取新的cookie即可。

Q: uvx命令找不到? A: 请先安装uv:pip install uv,然后确保PATH环境变量包含uv的安装路径。

免责声明

本项目仅用于学习交流,禁止用于其他用途,任何涉及商业盈利目的均不得使用,否则风险自负。

Installation

TypingMind
{
  "mcpServers": {
    "xhs-mcp": {
      "command": "uv",
      "args": [
        "--directory",
        "/Users/xxx/xhs-mcp",
        "run",
        "main.py"
      ]
    }
  }
}

Use Xhs MCP MCP with multiple AI models

TypingMind connects MCP tools at the workspace level, so once Xhs MCP is connected, you can use it with different AI models in TypingMind instead of setting it up separately for each model. This MCP runs locally through the TypingMind MCP connector on your device.

Setup guide to use the local connector

Use this when the MCP server needs access to local files, apps, or private resources on your computer.

1

Open the MCP settings

In TypingMind, go to Settings, Advanced Settings, then Model Context Protocol and choose Setup Connector.

  1. Open TypingMind in your browser.
  2. Click the Settings icon.
  3. Go to Advanced Settings.
  4. Open the Model Context Protocol section.
  5. Click Setup Connector and choose This Device.
TypingMind MCP connector setup screen with This Device selected
2

Run the connector command

Choose This Device, copy the command from TypingMind, and run it in Terminal. Keep the process running while you use MCP.

  1. Copy the setup command shown by TypingMind.
  2. Open Terminal on macOS or Windows Terminal on Windows.
  3. Paste and run the command.
  4. Approve the package install if Terminal asks you to proceed.
  5. Keep the Terminal window running while using MCP tools.
3

Add Xhs MCP as a server

When the connector status is Ready, click Edit Servers and paste the MCP server configuration.

  1. Wait until the connector status shows Ready.
  2. Click Edit Servers.
  3. Paste the Xhs MCP MCP server configuration.
  4. Save the server list.
  5. Refresh if you want to confirm the connector is still ready.
TypingMind MCP settings showing active server and Edit Servers button
{
  "mcpServers": {
    "xhs-mcp": {
      "command": "npx",
      "args": [
        "-y",
        "<mcp-server-package>"
      ]
    }
  }
}
4

Use it across models

Save the server list, open Plugins, enable the Xhs MCP MCP tools, then select any supported AI model in TypingMind and use the tools in chat or assign them to an AI agent.

  1. Open the Plugins page in TypingMind.
  2. Enable the Xhs MCP MCP tools.
  3. Start a chat and choose the AI model you want to use.
  4. Use the MCP tools in chat or assign them to an AI agent.
  5. Switch to another AI model whenever needed without reconnecting MCP.
TypingMind chat using enabled MCP tools with a selected AI model
Can you use Xhs MCP to help me with this task?
Xhs MCP
Sure. I read it.
Here is what I found using Xhs MCP.

Frequently asked questions

What is the Xhs MCP MCP server used for?

Xhs MCP is an MCP server that lets compatible AI clients connect to external tools and context. In TypingMind, you can add this MCP server once and make its tools available in your AI workspace.

Can I use Xhs MCP MCP with multiple AI models in TypingMind?

Yes. TypingMind connects MCP tools at the workspace level, so you can use Xhs MCP with different AI models such as Claude, ChatGPT, Gemini, or other models you have configured in TypingMind without setting up the MCP server separately for each model.

Why use Xhs MCP MCP with TypingMind?

TypingMind is one of the best frontends for LLM chat because it brings multiple AI models, prompts, plugins, AI agents, API keys, and MCP tools into one workspace. With Xhs MCP connected, you can use its MCP tools across your preferred models while keeping your chat workflow organized in TypingMind.

How do I connect Xhs MCP MCP to TypingMind?

Xhs MCP runs through the TypingMind local MCP connector. This is best when the MCP server needs access to local files, desktop apps, command-line tools, or private resources on your computer.

What tools does Xhs MCP MCP provide in TypingMind?

Xhs MCP exposes MCP capabilities that can be enabled from the TypingMind Plugins page and used in chat or assigned to AI agents.

Do I need to share my API keys with TypingMind to use Xhs MCP MCP?

No. TypingMind is local-first and lets you keep your model providers, API keys, prompts, and MCP configuration under your control. If Xhs MCP requires authentication, add the required headers, OAuth settings, or local configuration for that MCP server when you create the connection.

Related MCP Servers

View all

Set up your own AI workspace now

Get notified about new features and future giveaways by subscribing to our newsletter 👇